![Swept Logo.png]](https://knowledge.sweptworks.com/hs-fs/hubfs/Swept%20Logo.png?height=50&name=Swept%20Logo.png)
This functionality is ONLY available in the Optimize, Scale and Loyalty plans. To upgrade your plan, click here.
Who can create a Checklist?
Managers and Supervisors with access to the Web App can create Checklists. Managers and Supervisors can track uncompleted tasks and completed Checklists using the Checklist Results Report (only available on the Web App).
Checklist templates are not accessible to Supervisors.
Who can create Checklist Templates?
Admin Managers & Managers can create Checklist Templates.
Edit a checklist
- Sign in to the Swept Web App.
- Go to Locations. Click the three dots and select Checklists.
- Select a Checklist
- Edit the Checklist
- Click the SAVE blue button from the top right corner

Translating a Checklist
Checklist tasks can be translated to 100+ languages to help multilingual teams follow instructions more clearly on-site.
-
Managers can create checklist tasks as usual
-
Checklist tasks will appear automatically translated based on the cleaner’s language and device setup.
-
If not, the cleaner can use the Translate button at the top of the checklist.

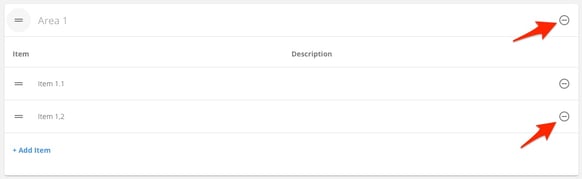
Delete an Area and an Item
Click the Minus icon to the right of the area and item line to delete the line

Delete a checklist
- Sign in to the Swept Web App.
- Go to Locations. Click the three dots and select Checklists.
- Select a Checklist
- Select the Arrow next to the blue Save button on the top right corner
- Select Delete Checklist from the drop-down menu

Convert a Checklist to a Checklist Template
- Sign in to the Swept Web App.
- Go to Locations. Click the three dots and select Checklists.
- Select the checklist you would like to update to a template.
- Click on the Arrow next to the blue Save button. Select Save & Create Template.

Assign checklists to cleaners
- Log in to the Swept Web App.
- Select Scheduling in the left-hand menu to get the expanded view.
- Select New Shift in the left-hand menu.
- Create the schedule as usual. Please note that Location, start date, start time, end date and end time are required fields.
- Once you add users to the shift, you will see a dropdown field under the Checklists column. From here, you can do three things when creating or editing a shift.
- Add a previously created checklist
- Start typing the name of the checklist you want to add to narrow down your options.
- Check the checkbox beside the checklist.
- Click outside of the dropdown to close it. The checklist name will appear.
- Remove a checklist
- Start typing the name of the checklist you want to add to narrow down your options.
- Uncheck the checkbox beside the checklist.
- Click outside of the dropdown to close it.
- Add a previously created checklist
If you have questions, please reach out to support@swept.com or ask a question in our chat bot.